Curify editorial team · October 27, 2026 · 7 min read
ASL Visual Guide: Hands, Movement and Facial Expressions
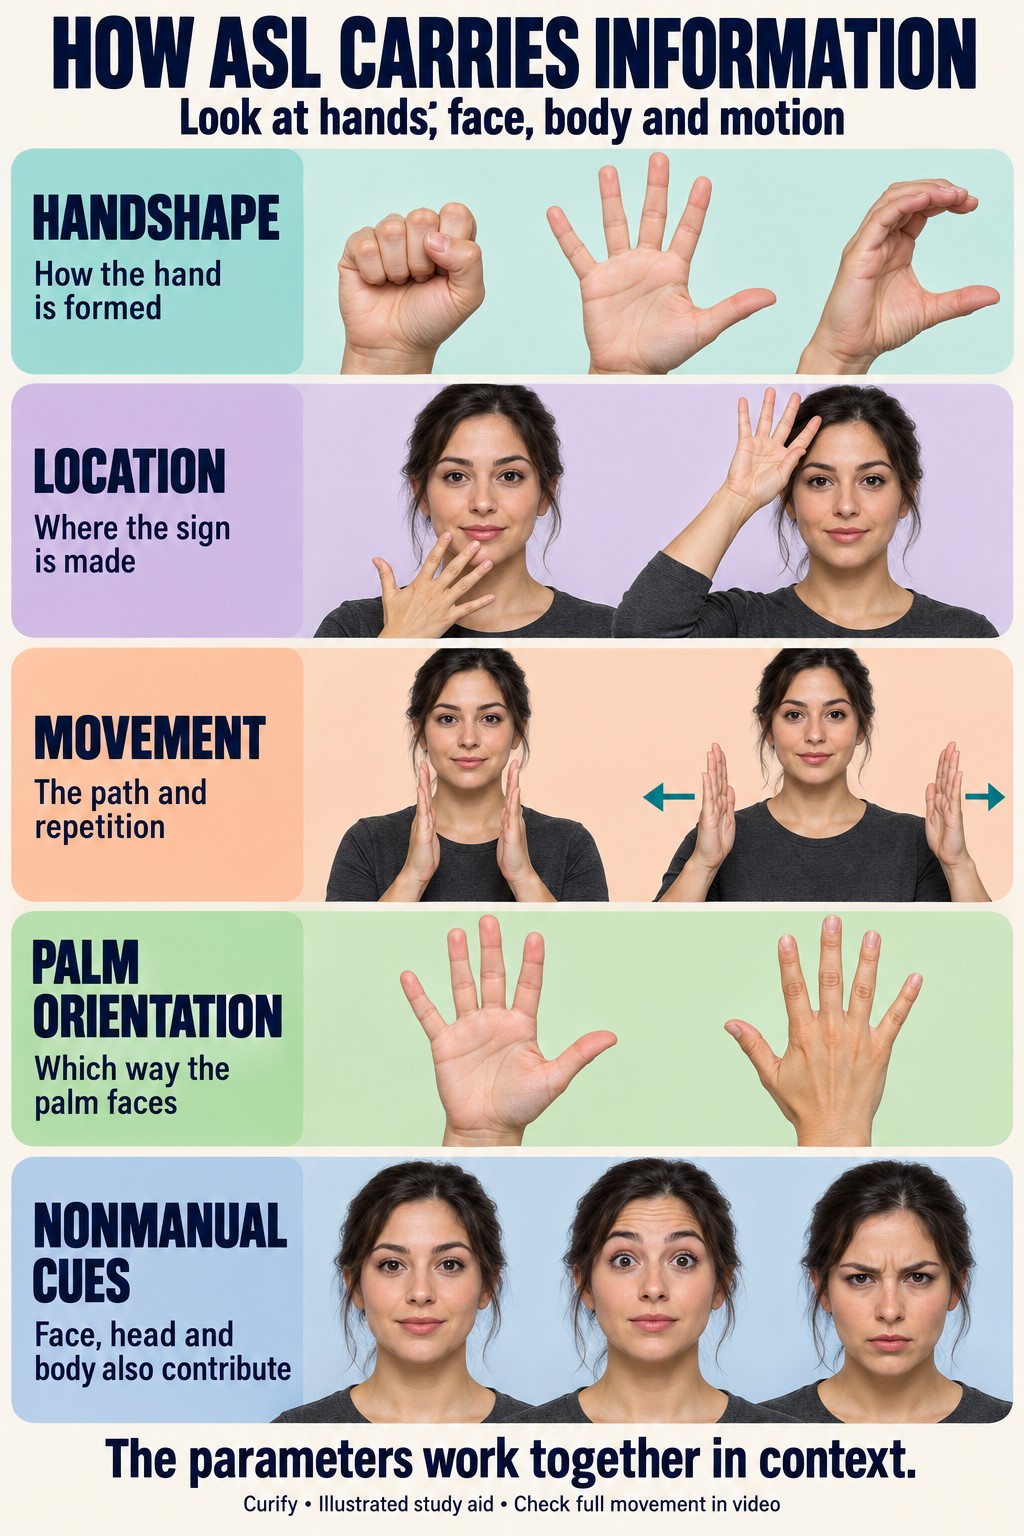
In ASL, where a hand is placed can distinguish two signs. Repeating a movement can change a word, and the eyebrows can help mark a question. These seven visual comparisons draw attention to differences that are easy to miss when looking only at an English translation.
The pictures are original AI-generated illustrations, not recordings of a teacher or independently certified sign demonstrations. Use them beside the linked video lessons to compare the full motion. They illustrate selected common forms; signing varies with context and community.
1. Five things to watch together
NIDCD describes ASL as a natural language with grammar distinct from English. A useful observation framework is handshape, location, movement, palm orientation and nonmanual cues. The last category includes the face, head and body. These features combine; a handshape on its own is not a dictionary definition.
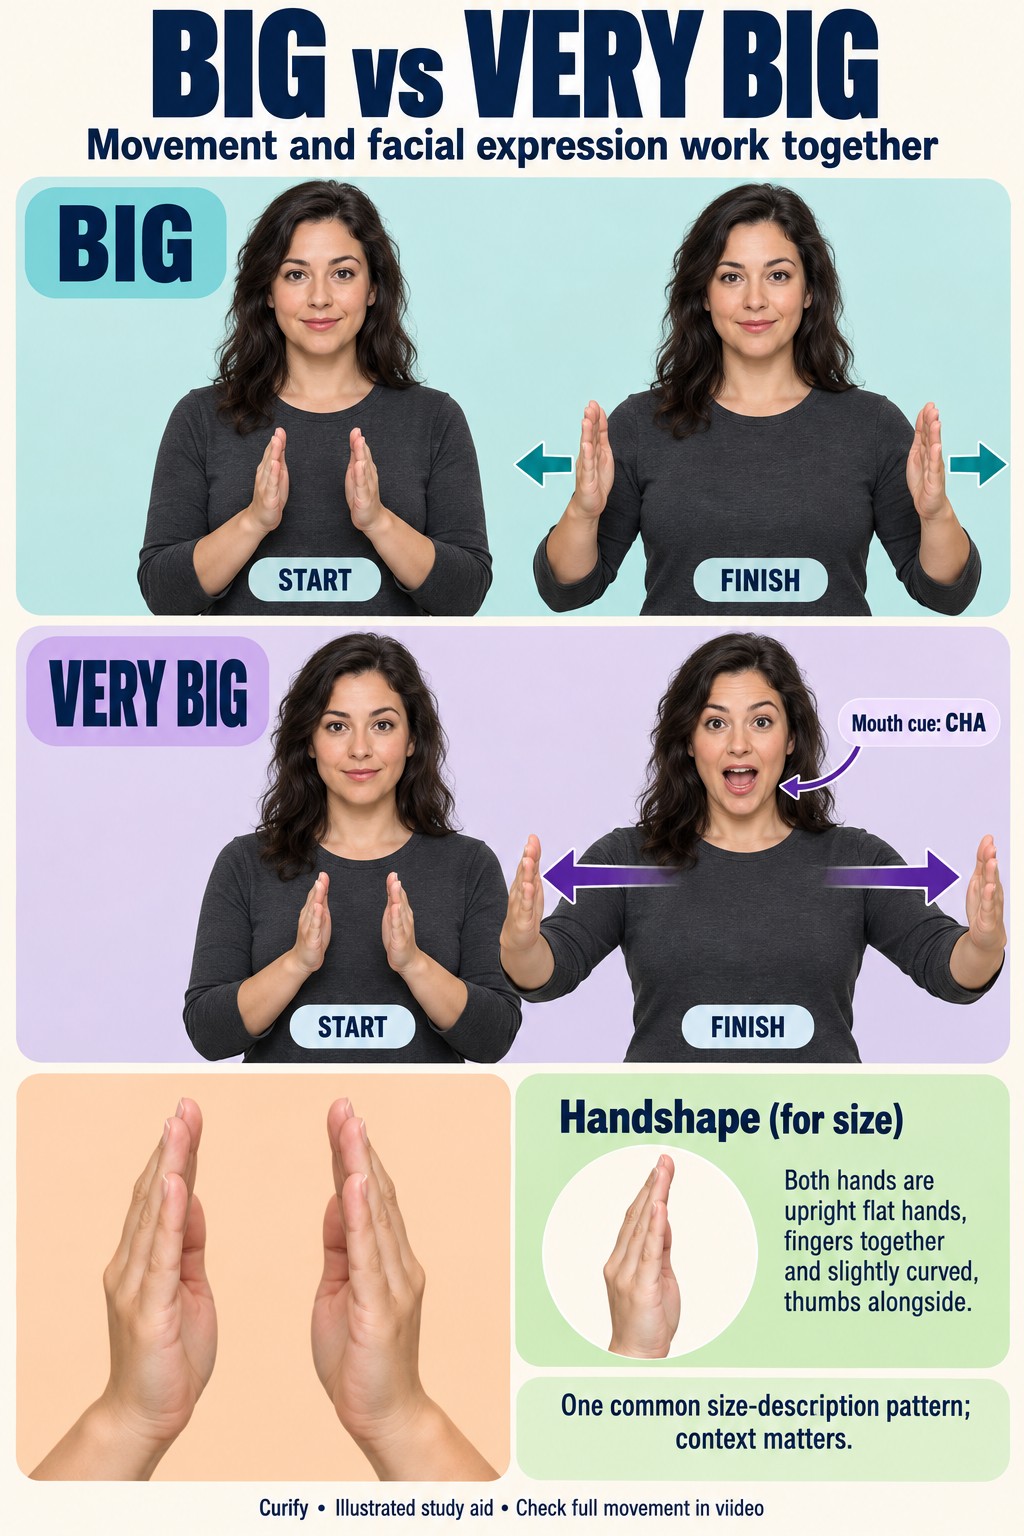
2. BIG and VERY BIG: watch the extent of the motion
A size description can use the space between the hands to make extent visible. The illustration uses a flat-hand variant, with palms facing each other and an outward movement. Its second row exaggerates the distance and adds a mouth cue. This is one way to express size, not a rule for every adjective or every use of “very.”
Lifeprint’s BIG lesson shows multiple forms and explains the role of movement size and the mouth morpheme CHA. Watch the lesson for the dynamic version; an open mouth in a still image cannot capture its articulation.
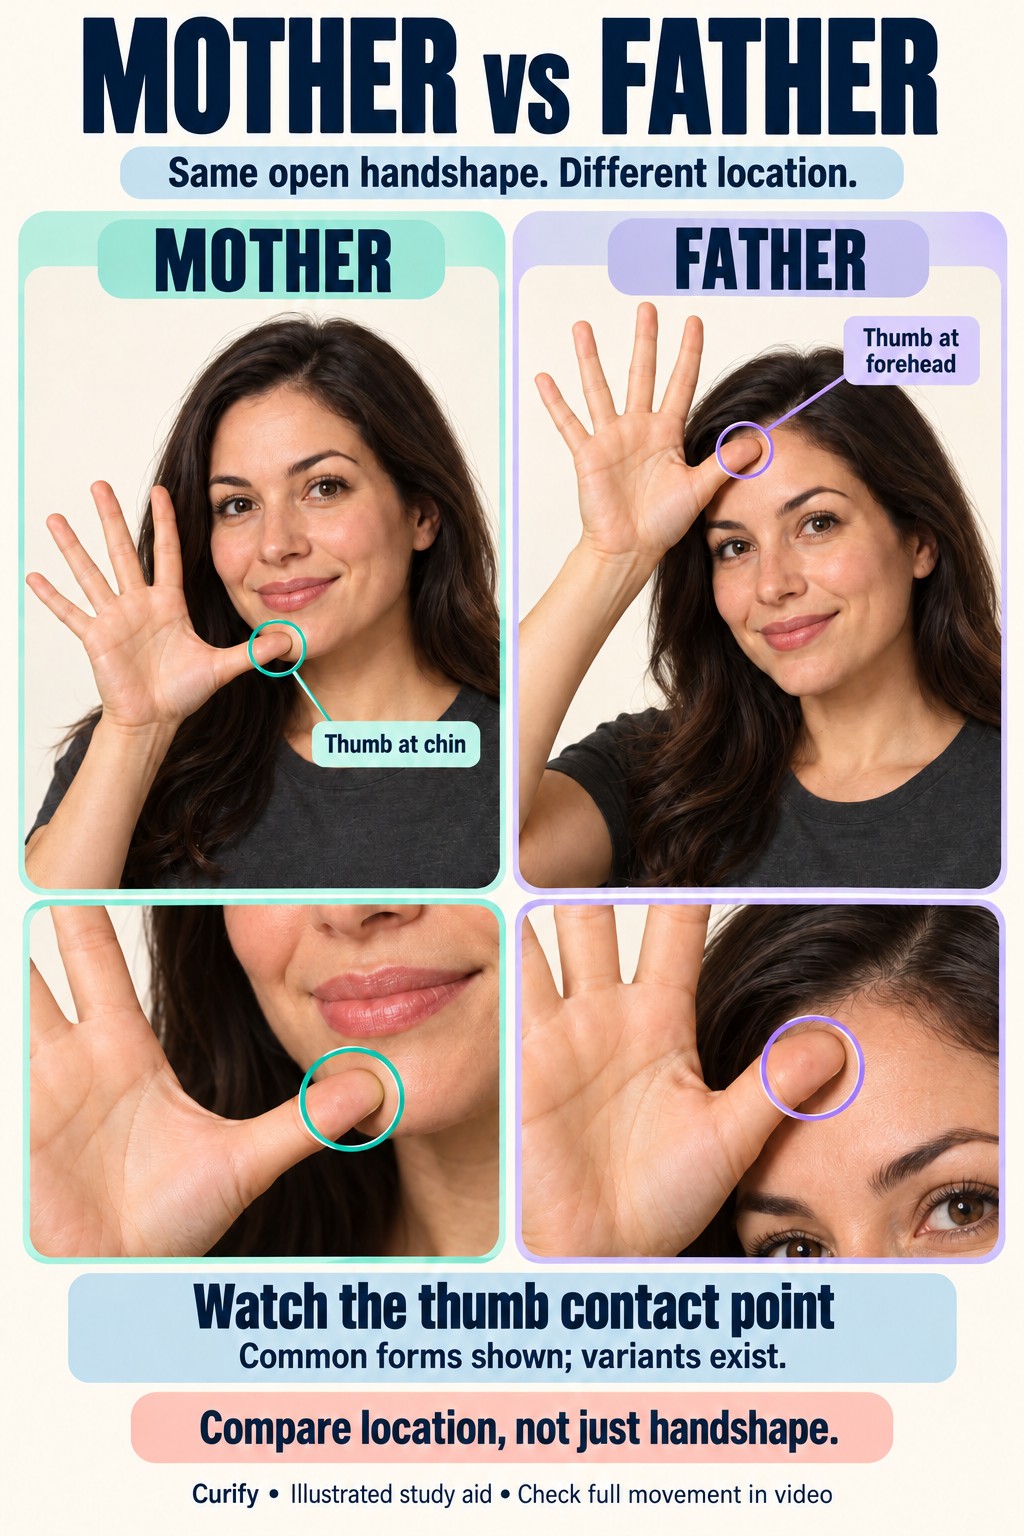
3. MOTHER and FATHER: location is information
In these common forms, an open hand with spread fingers is placed with the thumb at the chin for MOTHER and near the forehead for FATHER. The comparison keeps the handshape similar and changes its location. Watch the thumb’s contact point rather than the fingertips.
See the independent video lessons for MOTHER and FATHER. Variants exist; this pair does not imply a universal gender rule for all ASL vocabulary.
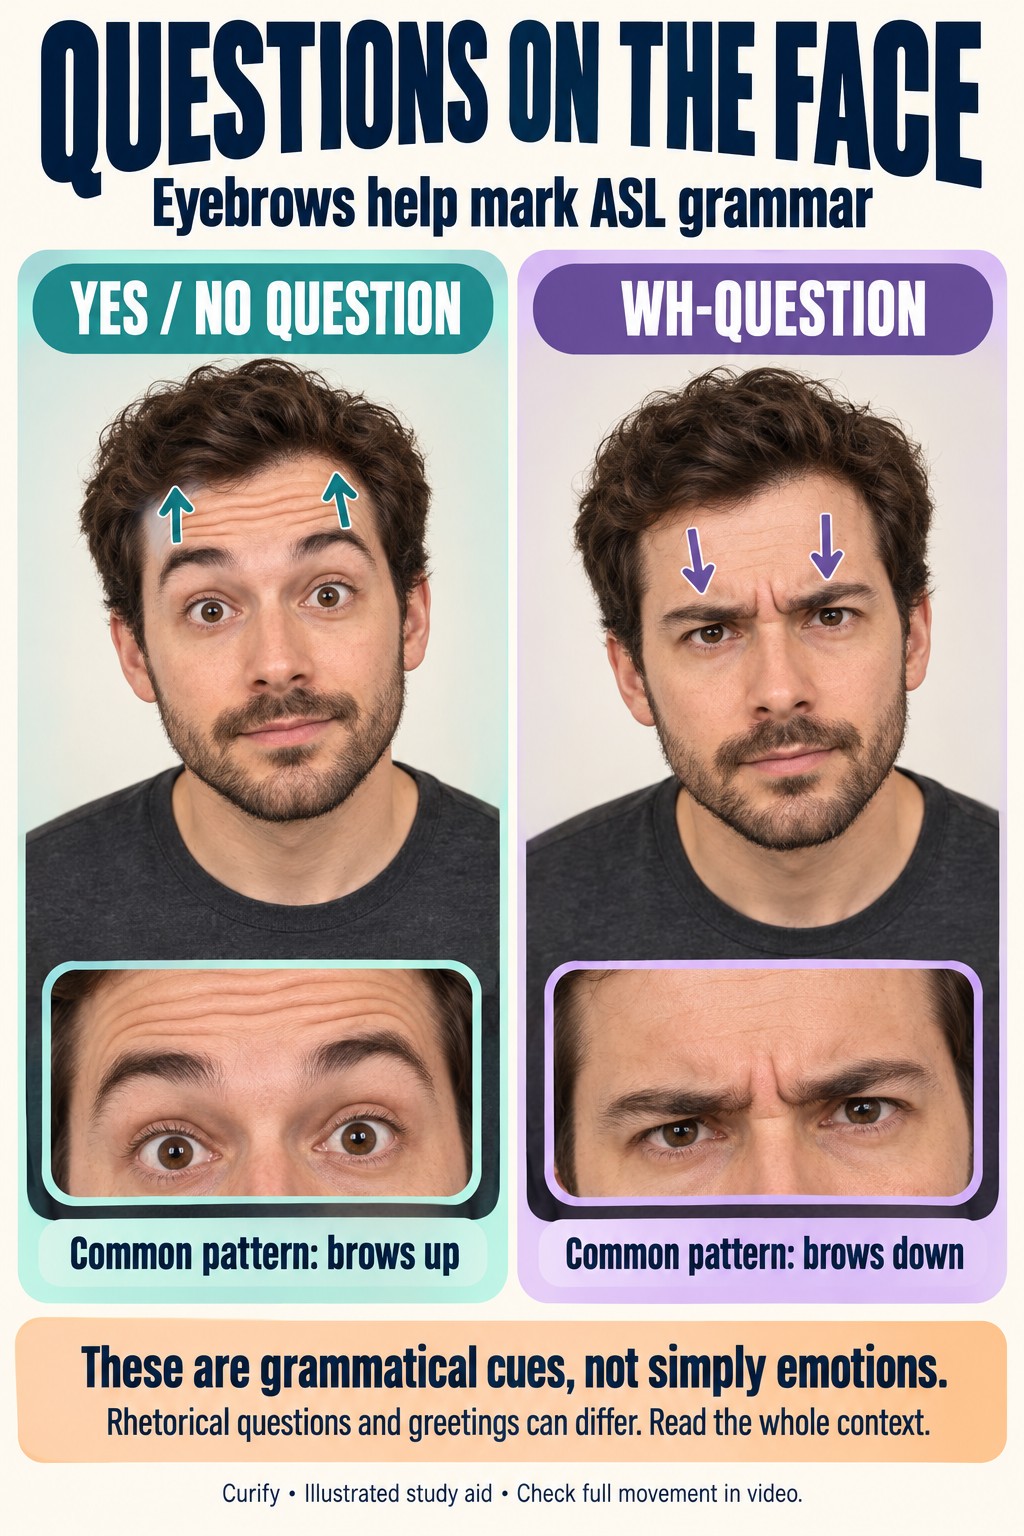
4. Questions: eyebrows carry grammatical information
A common introductory contrast is raised eyebrows for yes/no questions and lowered eyebrows for information-seeking WH-questions. These are grammatical signals, not simply a happy-versus-angry comparison. The pictured head and face positions are isolated cues rather than complete signed questions.
Lifeprint’s question lesson explains the contrast and its exceptions. Rhetorical questions and conversational greetings can use different patterns. Facial cues must be read with the signs and the situation.
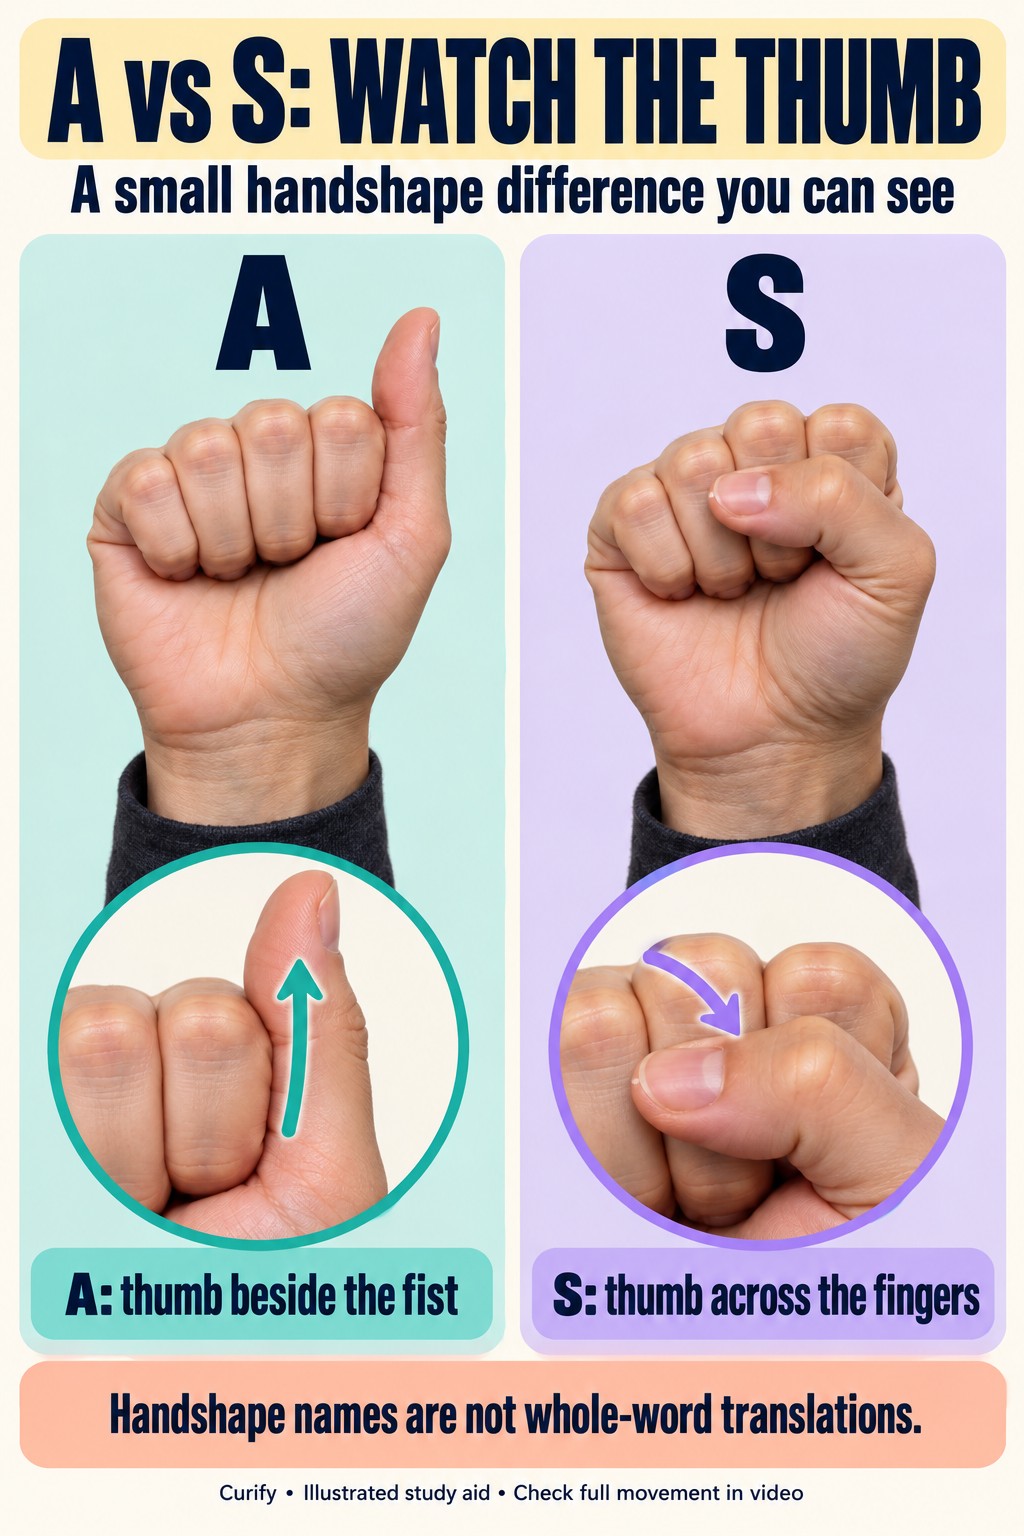
5. A and S handshapes: a small thumb difference
Both shapes involve a closed fist. In the A handshape, the thumb sits beside the fist; in the S handshape, it crosses the front of the folded fingers. Side-by-side closeups make that distinction easier to inspect. Handshape names are convenient labels and do not mean that every sign using one translates into that English letter or word.
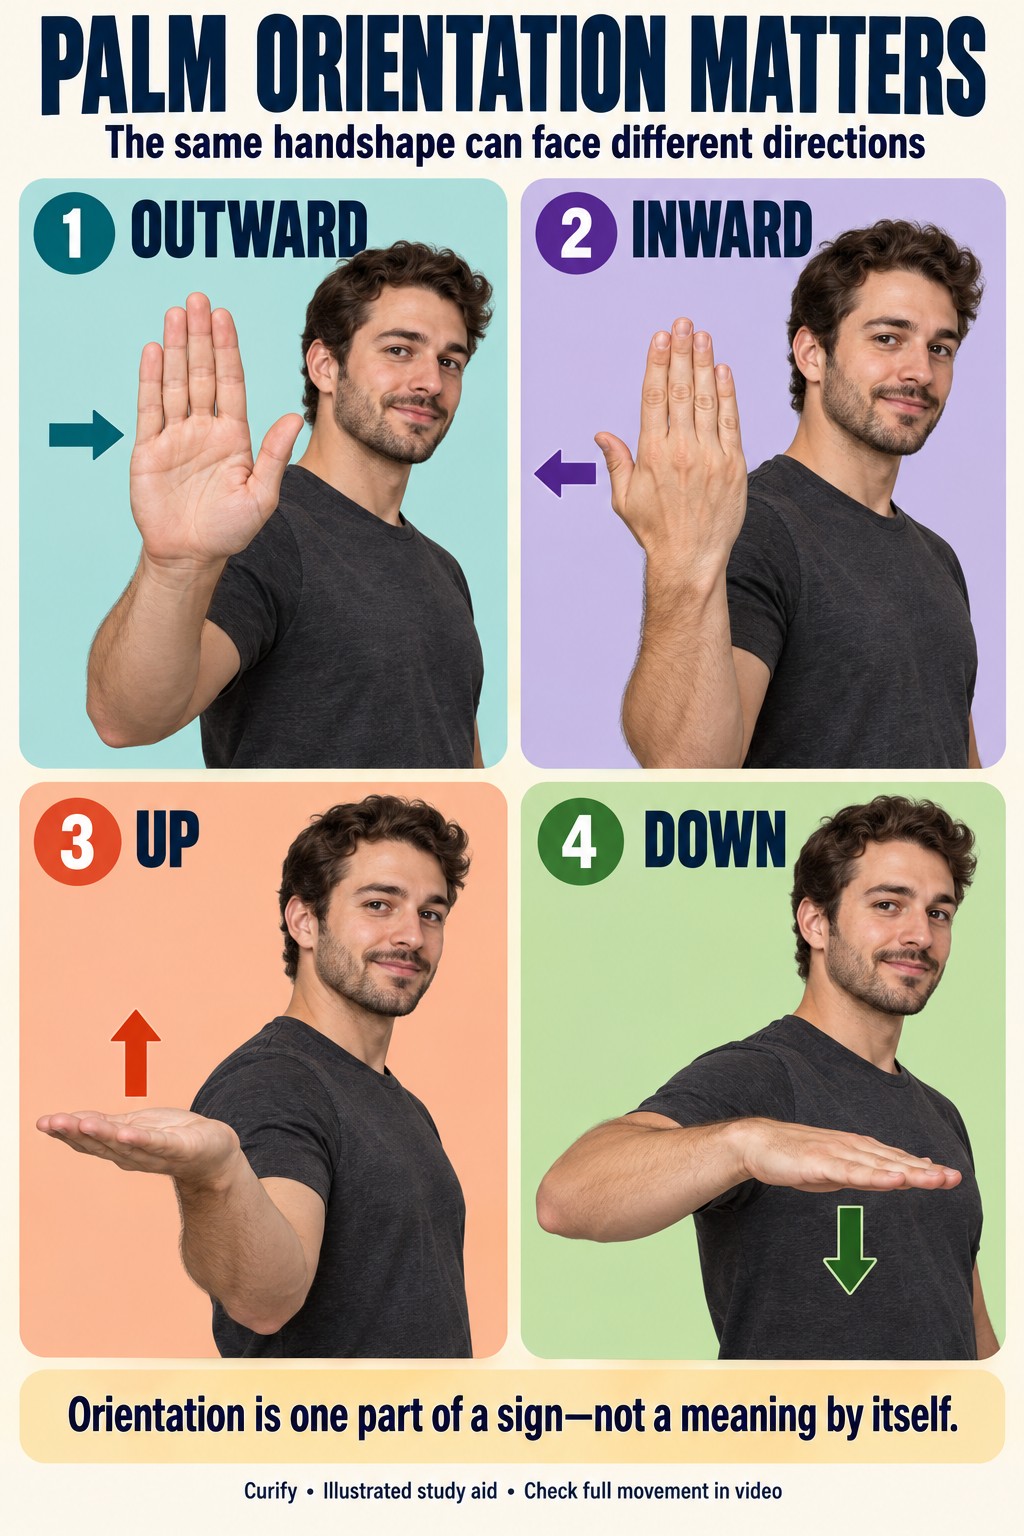
6. Palm orientation: the direction of the hand matters
A hand can keep a similar shape while its palm faces outward, inward, up or down. The four views show those directions relative to the signer. They are orientation demonstrations, not four vocabulary signs. To identify a sign, inspect the remaining features and the surrounding message too.
Lifeprint’s discussion of ASL parameters provides context for comparing these features rather than memorizing a disconnected pose.
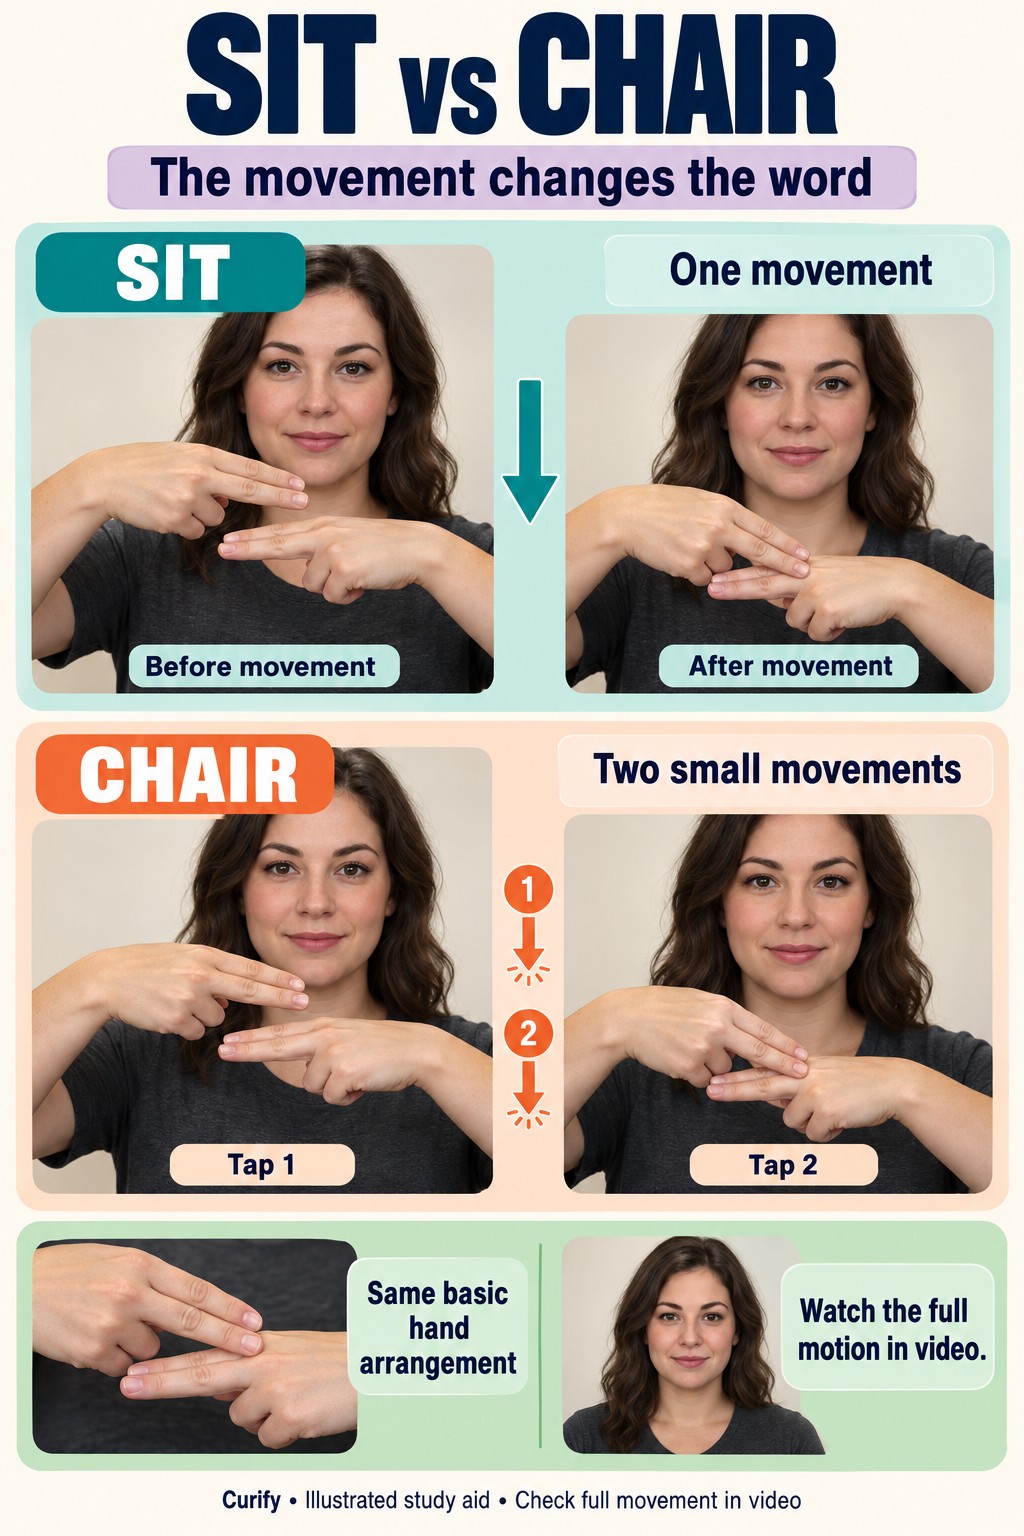
7. SIT and CHAIR: count the movements
This familiar noun–verb pair uses a similar two-handed arrangement. The common SIT form has one movement; CHAIR has a smaller repeated movement. The arrows are a reminder to inspect motion, not a replacement for watching it. Do not generalize the pattern to every ASL noun and verb.
Compare the video demonstrations for SIT and CHAIR, including hand arrangement, contact and repetition.
What these pictures mean for ASL video translation
These comparisons show why a single frame or an English word list cannot fully represent a signed message. In our ASL engineering experiments, an apparently successful demo was actually reading subtitles in the video. We corrected that interpretation: plausible English was not evidence that the model had understood the signing.
If you use the ASL video-to-English tool, treat the output as a draft. A fluent ASL reviewer should compare meaning, omissions and uncertainty against the source. The tool is separate from the poster generator and is not a substitute for qualified interpreting.
For more visual examples, open the ASL infographic template. For upload and output steps, see the video translation guide.
Sources and image provenance
The linked NIDCD and Lifeprint pages support the concepts described here. The pictures are newly generated, not copied teacher photographs. These organizations and teachers have not endorsed or reviewed this article. Image prompts and editorial checks are recorded with our content drop; independent fluent-ASL review is still needed before treating the illustrations as teaching references.